
Section 3 - Installing Fence Panels
Once your posts are installed and secure, you can fit your Future Fence panels. Support each panel at the required height, check it is level and fix the top brackets before the bottom brackets.
3.1 Fixing Panels to Aluminium Posts
Tools and fixings: Drill/driver, supplied powder-coated self-drilling screws, 5/16″ or 3/8″ hex-head nut driver.
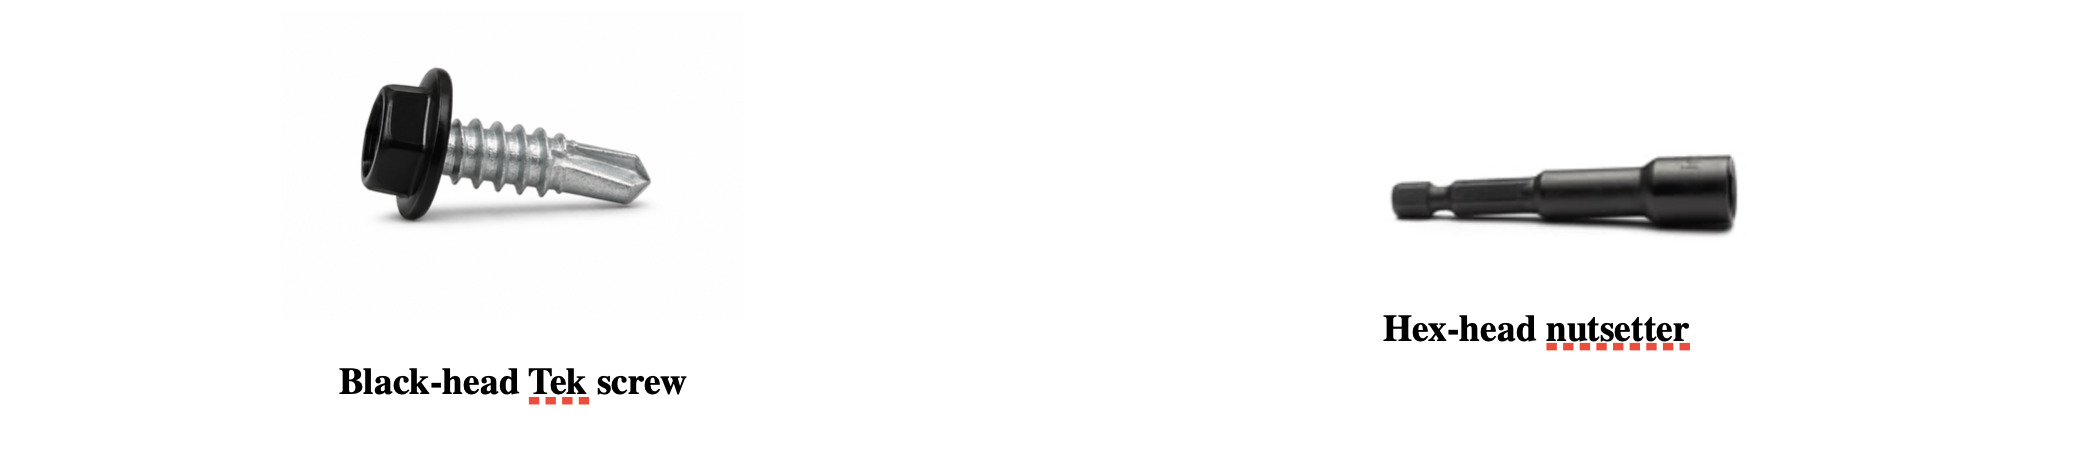
Slide the supplied brackets onto the top and bottom rails at each end of the panel.
Position the panel between the posts.
Place suitable timber blocks or packers underneath the panel to support its weight.
Adjust the packers until the panel tops are level and aligned with adjoining panels.
Slide the top brackets against the posts and secure them with the supplied self-drilling screws.
Check that the panel is plumb and aligned with the posts using a spirit level.
Slide the bottom brackets into position and secure them to the posts.
Remove the temporary supports and check the panel is level, plumb and secure.
Helpful tip: No pilot holes are needed for the supplied self-drilling screws. Do not overtighten, as this can strip the screw threads in the aluminium post.
3.2 Fixing Panels to Hardwood/Pine Posts
Tools and fixings: Drill/driver, pilot drill bit, 5/16″ hex-head nut driver, 12G × 50 mm Type 17 hex-head timber screws.

Position the panel and brackets against the timber posts, supporting the panel at the required height.
Check the top of the panel is level and mark fixing positions.
Pre-drill pilot holes suited to the screw and timber.
Fix the top brackets first. Check the panel is plumb, then secure the bottom brackets.
Remove supports and check all brackets are secure.
Helpful tip: Pre-drilling timber helps prevent the post from splitting and reduces the risk of screws snapping during installation, particularly when fixing into hardwood.
3.3 Fixing Panels to Brickwork & Blockwork
Tools and fixings: Hammer drill, 8 mm masonry drill bit, vacuum, drill/driver, 5/16″ hex-head nut driver, 8 mm universal nylon plugs and 12G × 50 mm Type 17 hex-head screws.

Support the panel at the required height and mark bracket fixing positions.
Check that the brickwork or blockwork is sound and suitable for the proposed fixings.
Drill 8 mm masonry holes to the required depth for the supplied nylon plugs.
Remove dust from each hole.
Insert the nylon plugs and position the brackets.
Secure the top brackets, check the panel is plumb, then secure the bottom brackets.
Check that the panel and all brackets are securely fixed.
Helpful tip: Mark the required drilling depth on the masonry drill bit with tape.
3.4 Cutting Aluminium Fence Panels and Posts
Tools and equipment: Circular saw fitted with a suitable non-ferrous aluminium cutting blade, tape measure, square or straightedge, masking tape, padded supports and appropriate personal protective equipment.
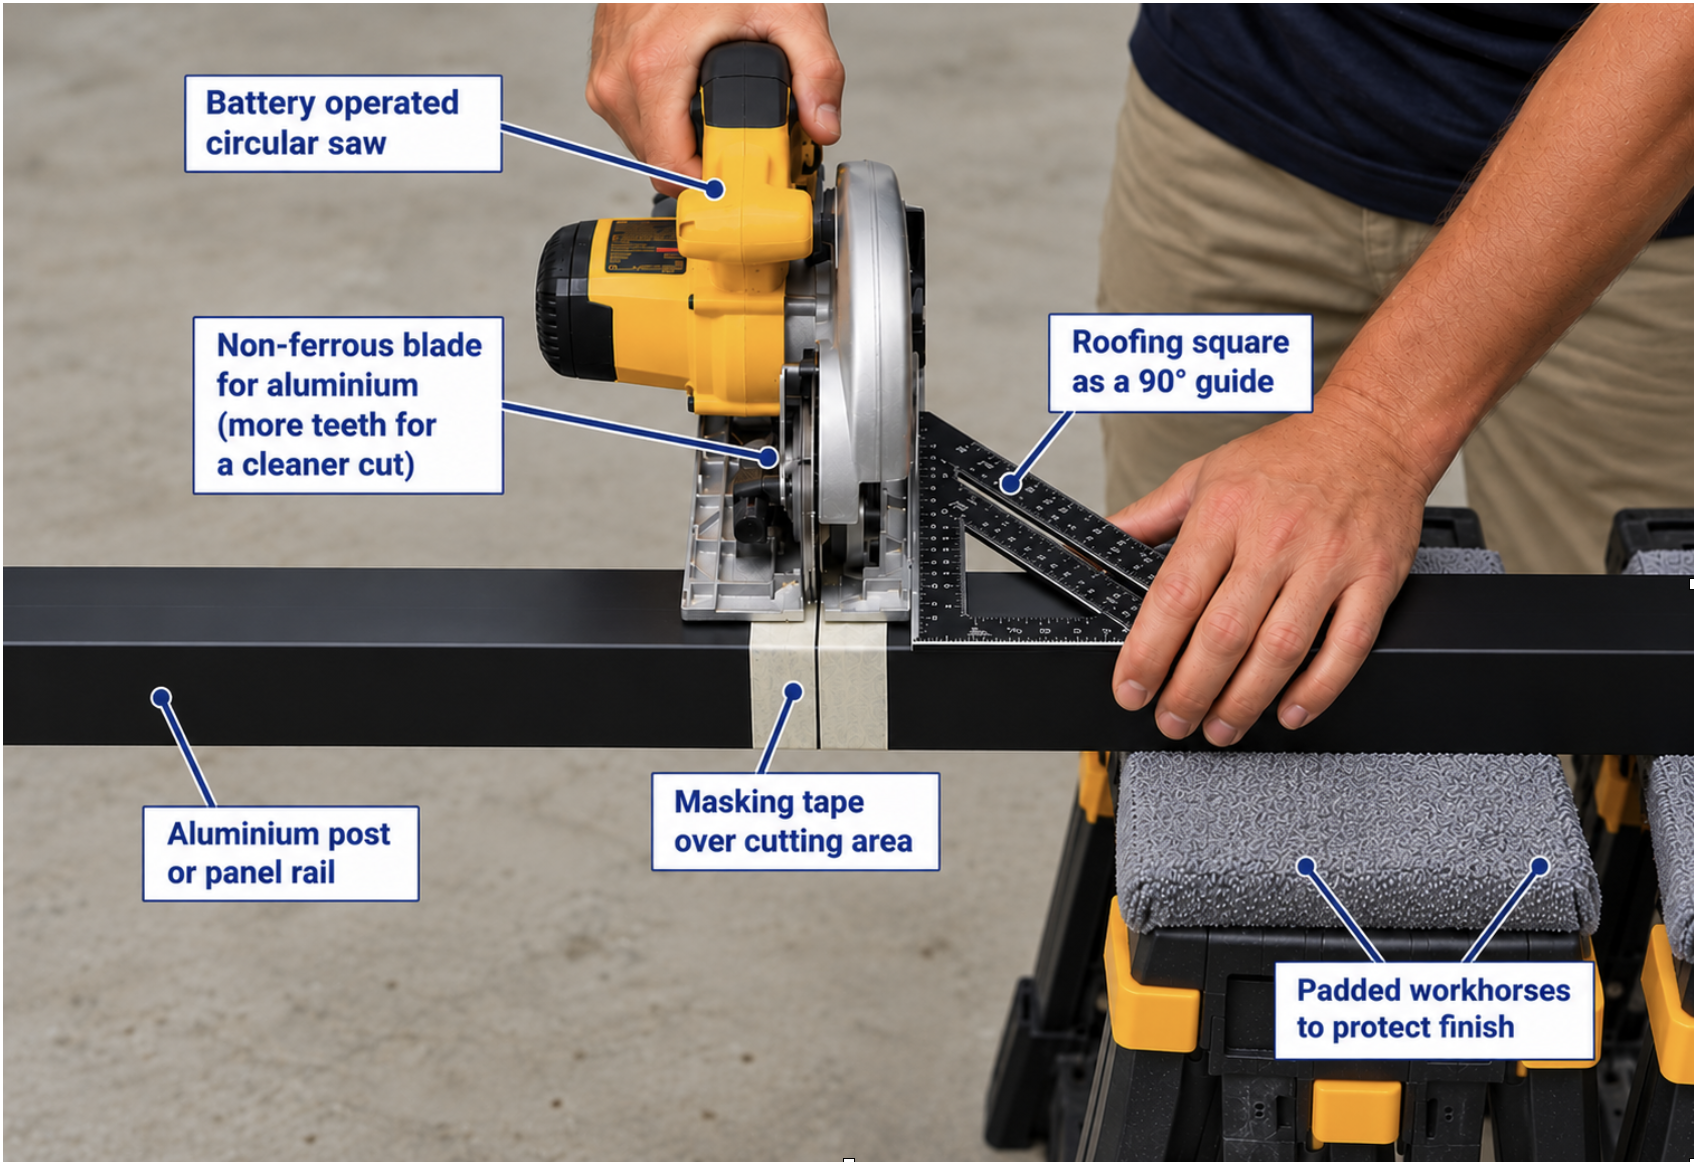
Measure the required finished length carefully and mark the cutting line. Double-check the measurement before cutting.
Support the panel or post securely on stable workhorses or padded supports. Protect the powder-coated finish with cardboard or soft padding.
Apply masking tape around the cutting area to help protect the finish, then mark a clear, square cutting line.
Fit a sharp blade designed for cutting non-ferrous aluminium. Check the blade is installed in the correct direction and follow the saw manufacturer’s instructions.
Use a square or securely positioned straightedge as a cutting guide. Keep hands clear of the blade and ensure the offcut is supported so it cannot pinch the blade or fall unexpectedly.
Cut steadily without forcing the saw. For large panels or long posts, have a second person assist with handling and support.
Carefully remove sharp burrs and all aluminium swarf with a soft brush or vacuum. Inspect the cut edge and surrounding powder coating for damage.
Helpful tip: Aluminium swarf can scratch powder coating. Remove it promptly and avoid wiping loose shavings across the finished surface.